
Yes. You heard me. I made an egg carton out of paper, cardstock actually, which is paper, but you might think normal 20lb paper weight and not 90lb paper weight, which actually is heavier than the cardstock I was using. Anyway…
Why ever would anyone want to MAKE an egg carton? Most people are trying to find ways to USE their egg cartons in some kind of craft. Welp, it’s mostly because of those blasted chickens my mother keeps. Because now, people all think that we get fresh eggs! THE FRESHEST! OMG, please to give us some fresh eggs they are surely the tastiest ever (EVAR) and so much more healthy the ones you can get in the store and they’re organic and come from free range chickens! That is what everyone is basically saying. Ok, not really. But they do sometimes ask for eggs because they’d like to see the difference between a really fresh egg (that is organic and free range) and a relatively fresh egg (that claims it’s organic and/or range free) from the store.
That’s fine, except you can’t just give someone a handful of eggs. Raw eggs are notoriously difficult to transport. So my mother has been giving out eggs by the dozen, or 1.5 dozen because that’s the smallest number of eggs Costco sells (she’s been saving these egg cartons for a long time). The she complains that she doesn’t get to eat any of the eggs as everyone keeps asking for them. I mentioned that her problem might be that she’s giving out eggs a dozen at a time. We were getting four a day before. Now, on the best days we get seven. Obviously, the chickens can’t keep up if my mom is giving out at least a dozen eggs at a time. But then my mother despaired because she can only get egg cartons that are for a dozen or 1.5 dozen. She doesn’t like the idea of cutting them to size so, I decided to just make some kind of disposable container that can transport eggs in relative safety. At least safer than just handing someone a double handful of eggs. A large double handful. Have you ever tried carrying a dozen eggs in your hands? It’s pretty difficult.
Well, I have a Silhouette. It makes cutting weird shapes really easy. So I quickly came up with a box shape and an insert for the eggs. There are two little pedestal things that you fold underneath the insert to keep it from buckling under the weight of the eggs. Tada! Paper egg carton!
I suppose if you don’t have chickens and people constantly asking to try fresh eggs, you could make this for Easter. As I hear that sometimes there are eggs involved with the celebration of Easter? (I don’t celebrate it.)
Materials:
- template (.studio only)
- 2 sheets 12″x12″ cardstock (obviously heavier weight cardstock will give you a sturdier box)
- glue (I’ve used both a glue stick and white glue for this. It’s your preference.)
Procedure:
- Use your Silhouette to cut out all the shapes from the template. The flaps are automatically set to be perforated, so you should be able to just send the pattern to the Silhouette as is. If you need help figuring out which piece is what, they are all labeled on the file. The labels obviously will not be cut out so you’ll just have to reference your screen. Right now the template is only for 12″x12″ sheets of cardstock. I suppose if anyone really needs it, I could rearrange everything for 8.5″x11″ sheets of cardstock. And I suppose if anyone really, really needs it, I could make the same in pdf and you could hand cut everything. Oh, and I suppose if you were going to decorate the box, it would be best to do it now.

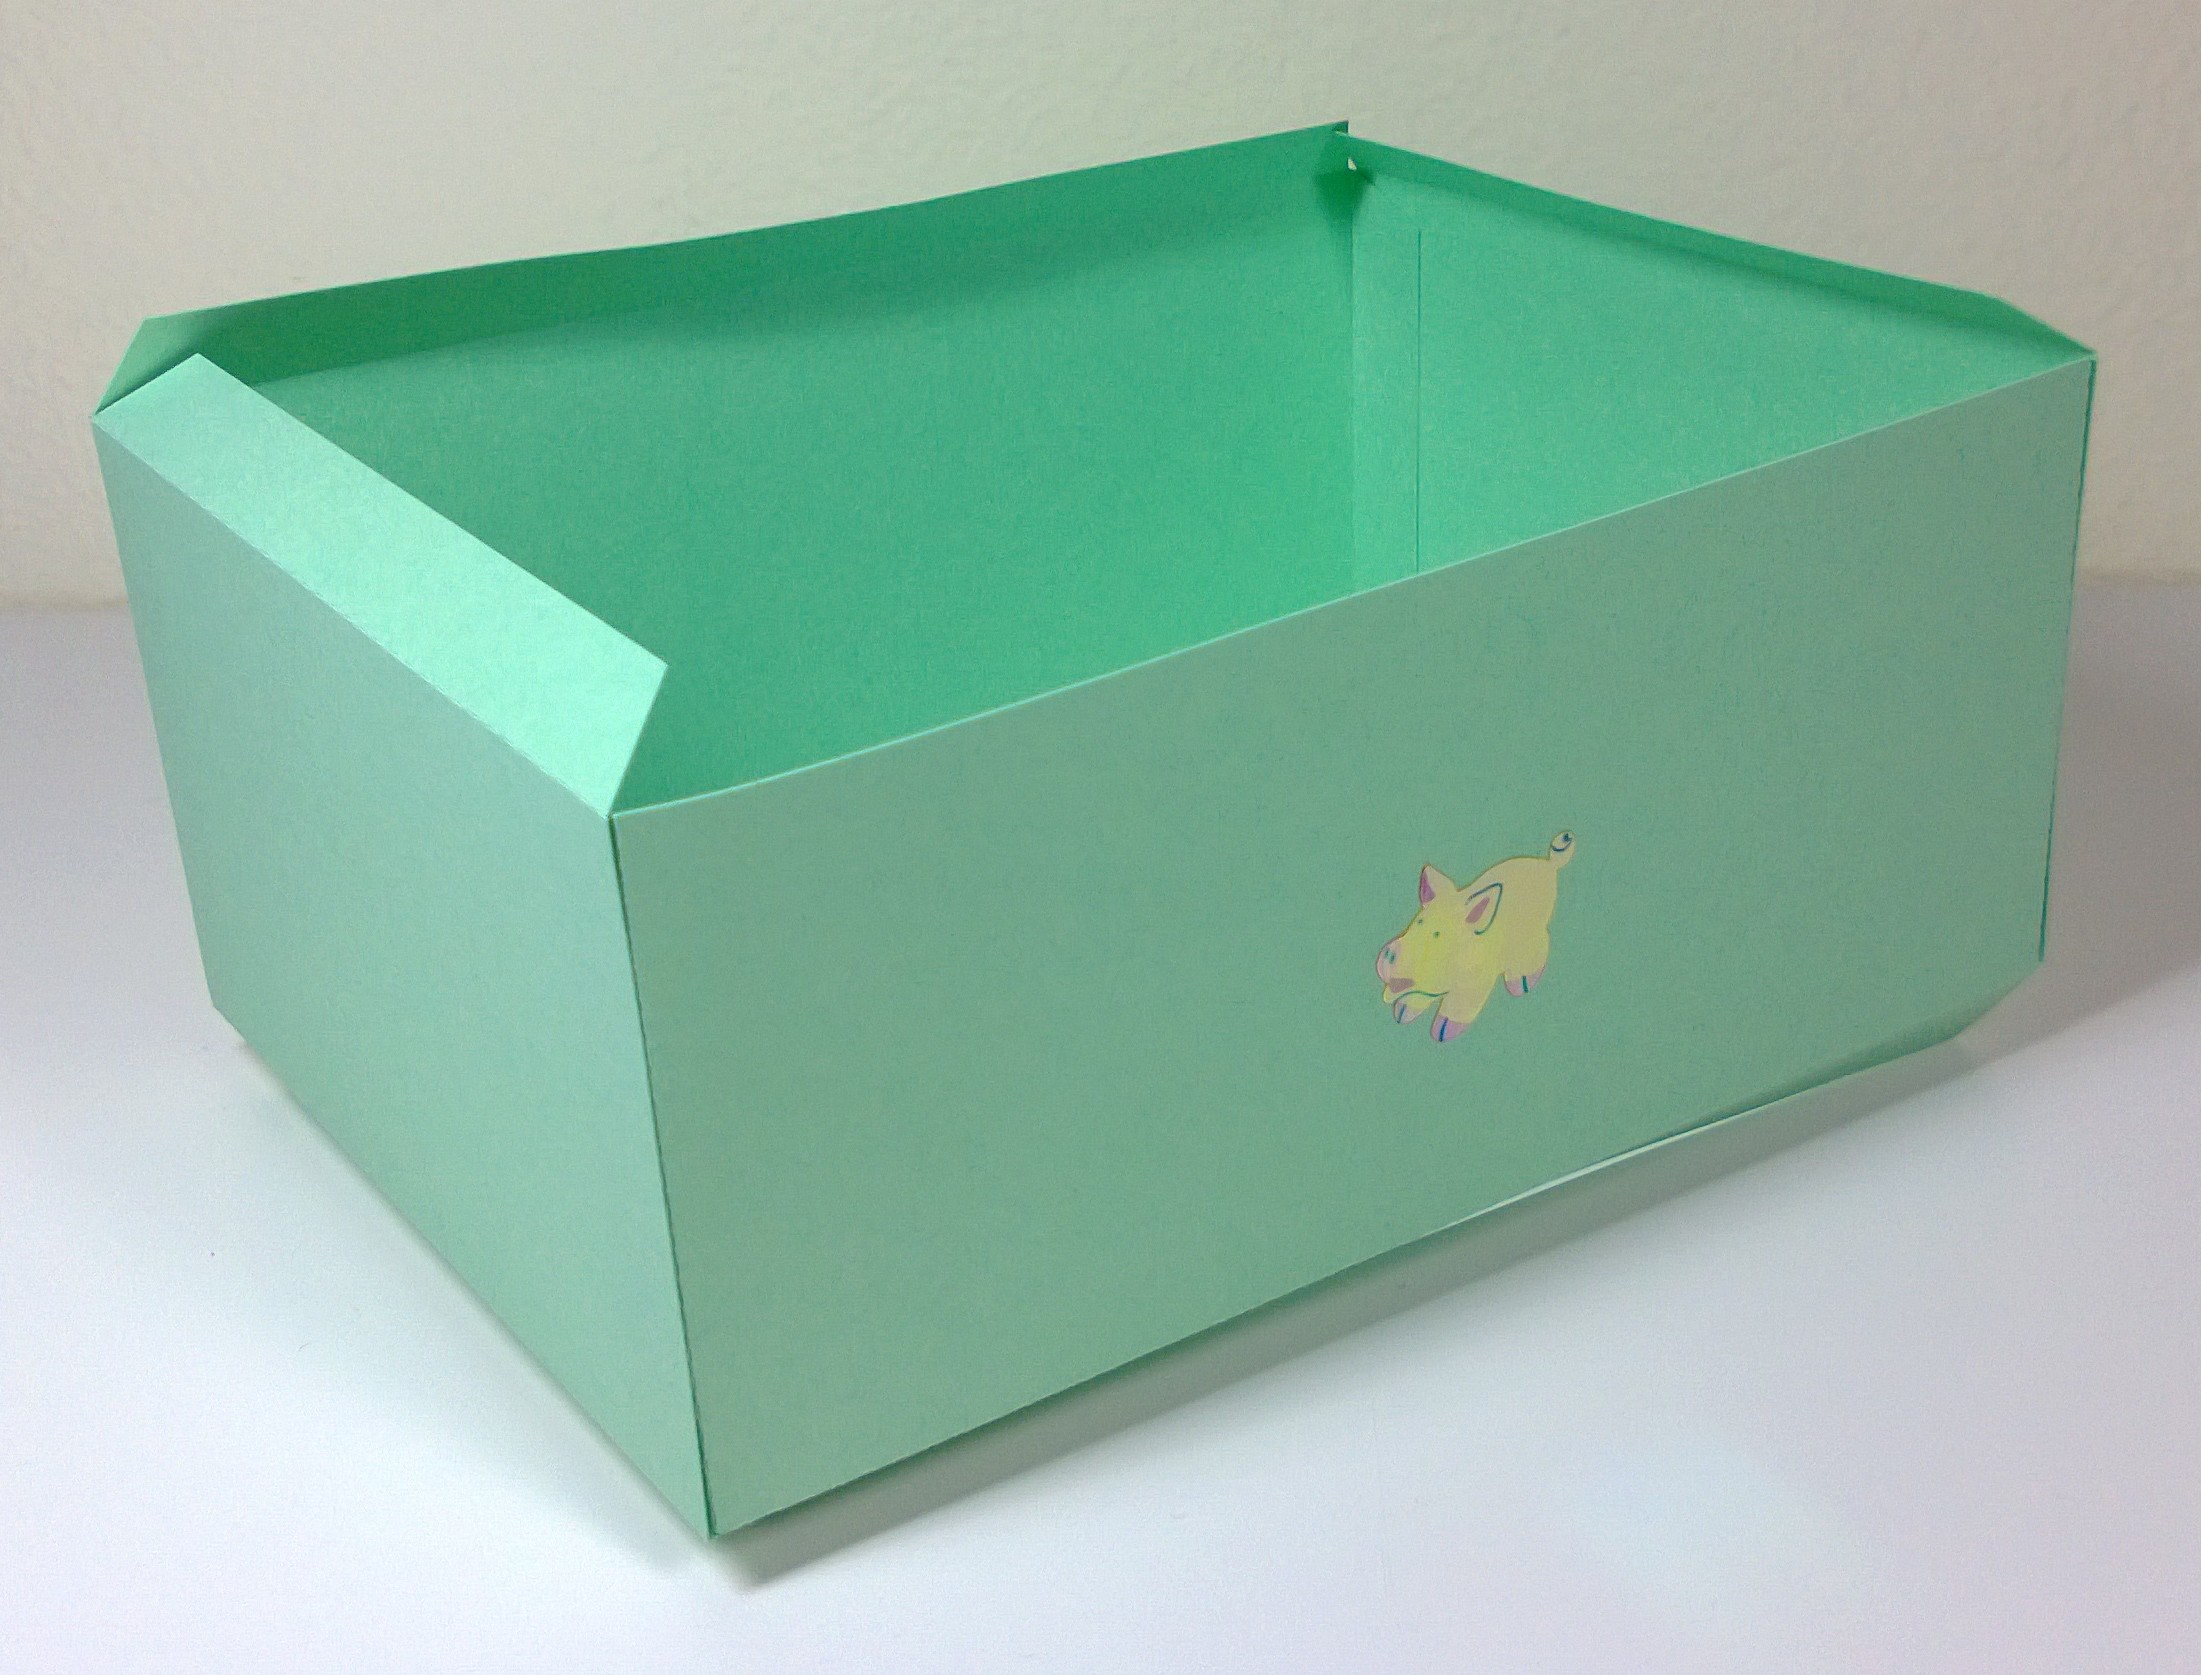
- Assemble the side walls of the egg carton. This is pretty straight forward. You may wish to pre-fold all the flaps before gluing, but you don’t have to. Generally speaking, you only apply glue to the flaps and flaps are only glued to a straight edge (as opposed to another flap). Orientation for the side walls don’t really matter until you need to glue the bottom of the carton on. I also don’t like to see the flaps, so I glue everything on the inside.

The carton is being shown right side up with the front of the carton facing you (well, it’s an isometric view but you get the point). Also, please ignore the pig. I know eggs don’t come from pigs. It’s just that all my bird related stickers are in my guitar case and I’m too lazy to dig them out right now.
- Glue the bottom onto the assembled side walls. The bottom is the side with four flaps. I glue the bottom piece on the outside of the carton to hide the flaps. You can glue the bottom piece to the inside as it is cut slightly smaller than the perimeter of the carton for said reason (and also to reduce the number of sheets of cardstock you would need to use for this project). Because I glue the bottom flap onto the outside of the carton, I find it easier to put glue around the outer 0.25″ or so of the bottom piece and then stick the side walls onto it.

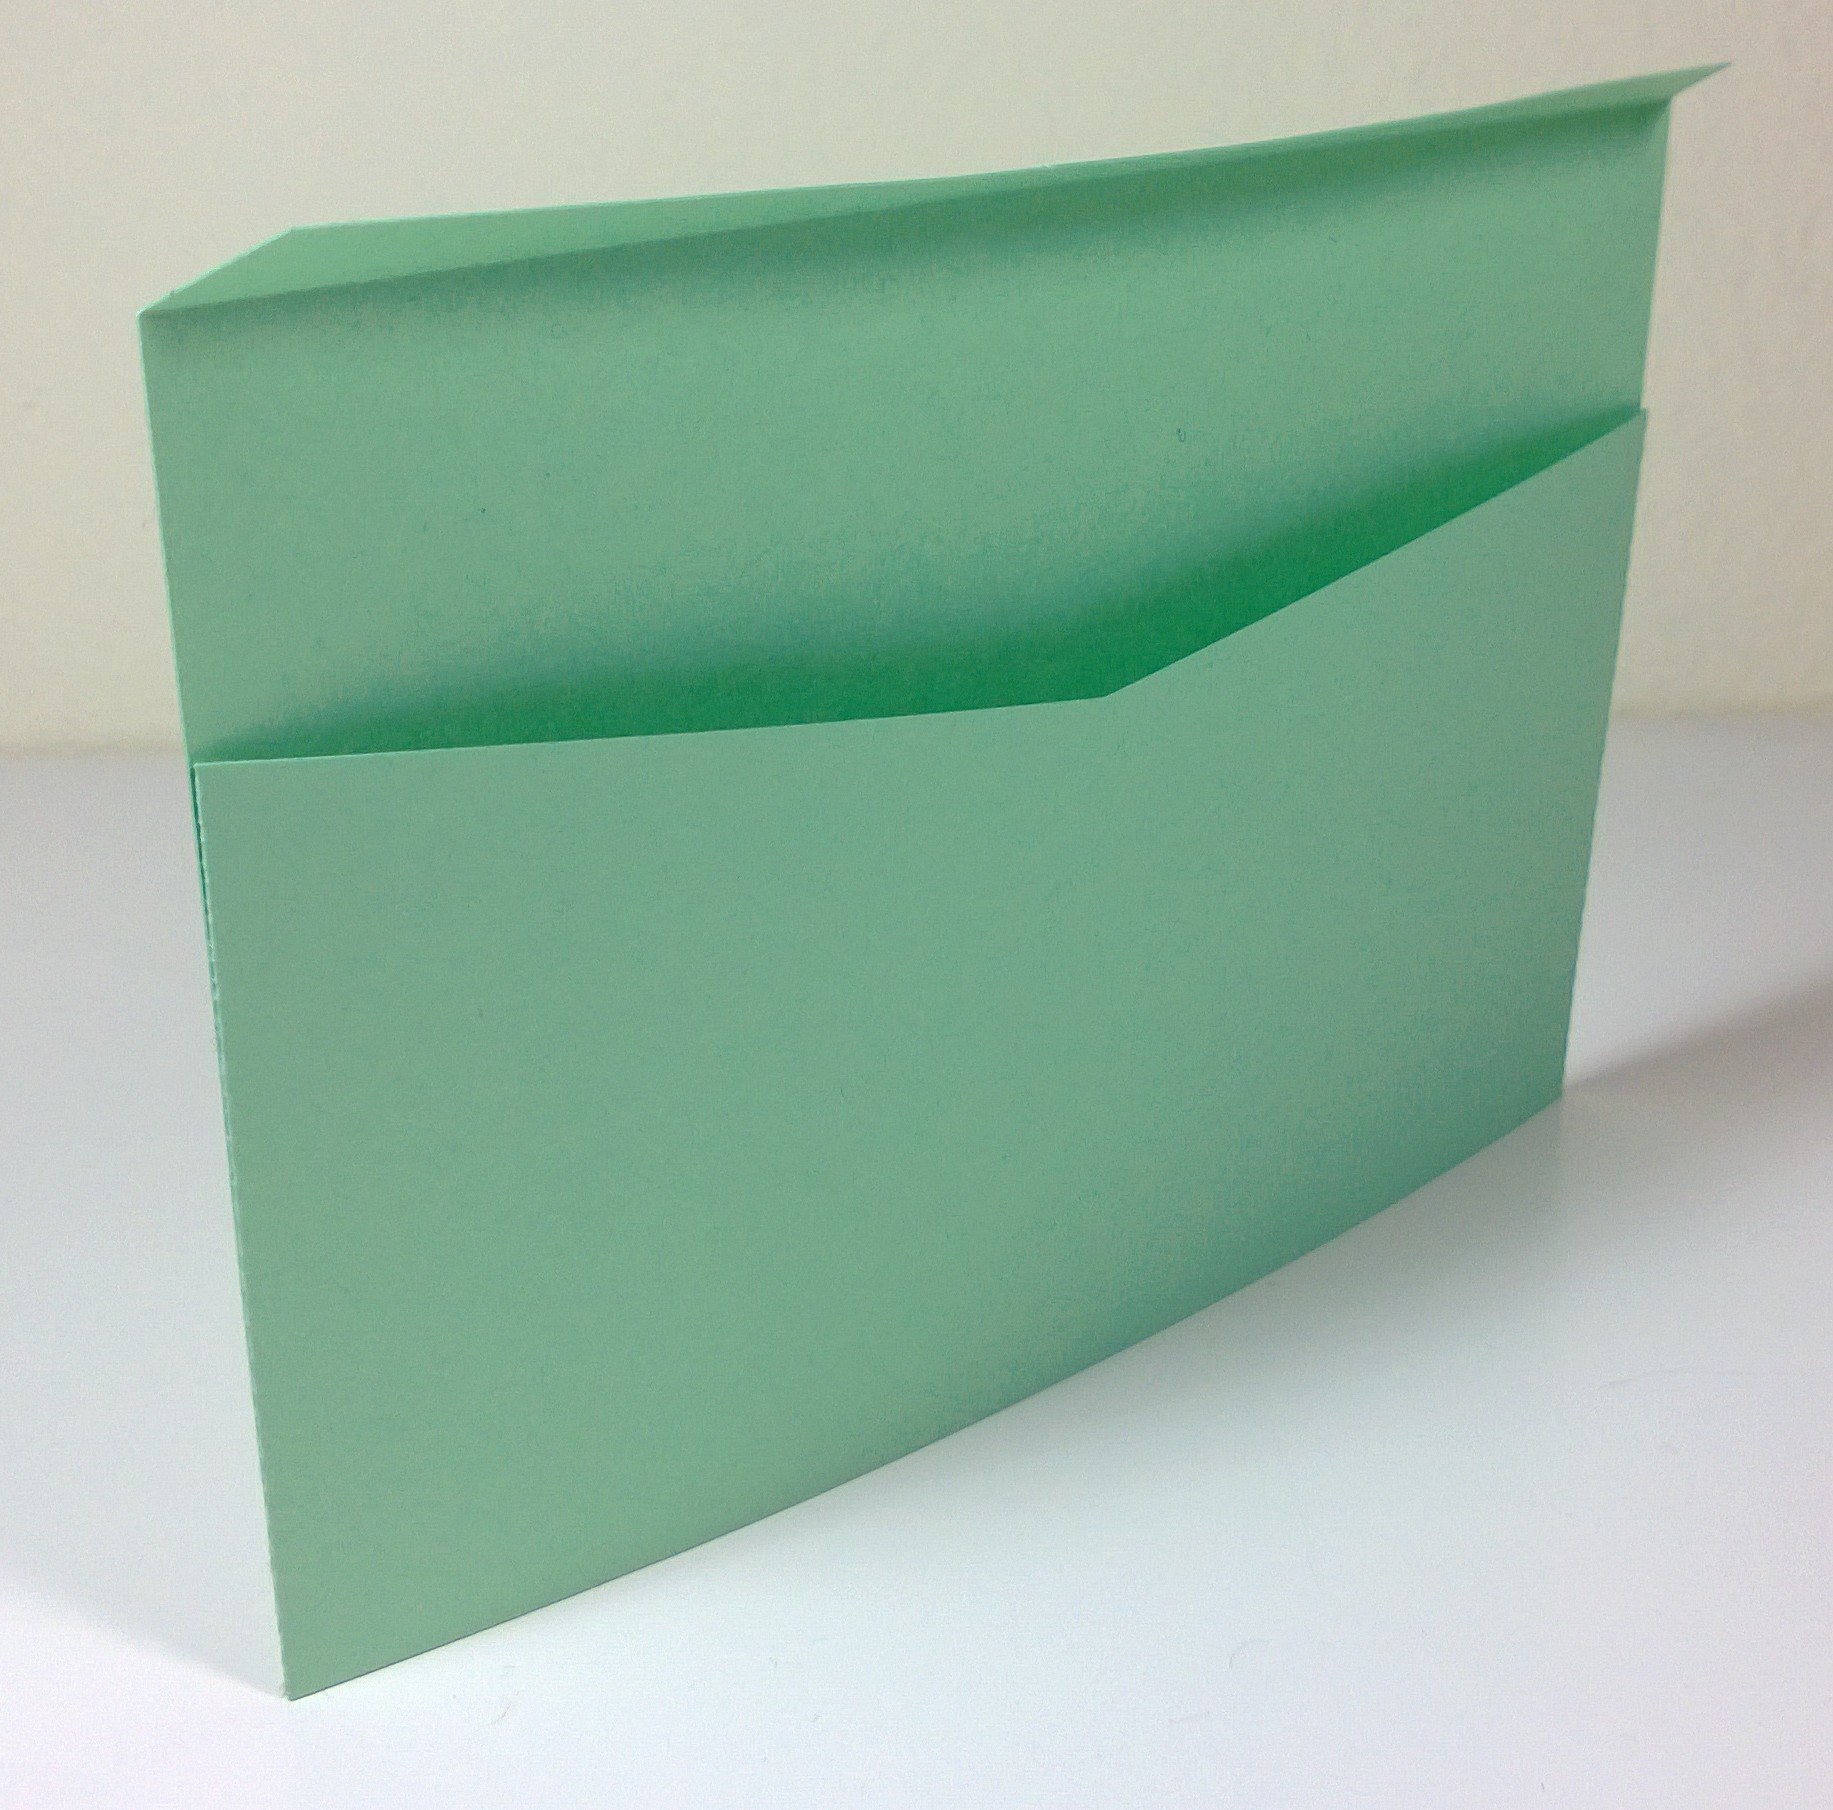
- Glue the cardholder flap onto the lid. When you glue down the cardholder, make sure the straight edges are aligned. That will be the side you glue to the rest of the carton. Again, I glue so that the flaps are hidden. The cardholder is obviously so that you can hold a card but also to give the lid some structural integrity. You don’t have to glue it on but if you don’t, I would recommend that you use some pretty sturdy cardstock, otherwise the lid may sag.

- Glue the lid onto the carton. Remember how the top of carton had three flaps? The two flaps on the side of the carton are for support and the long one in the back is where you attach the lid. I like to put glue on both sides of the flap and then slide the flap in between the lid and cardholder flap.

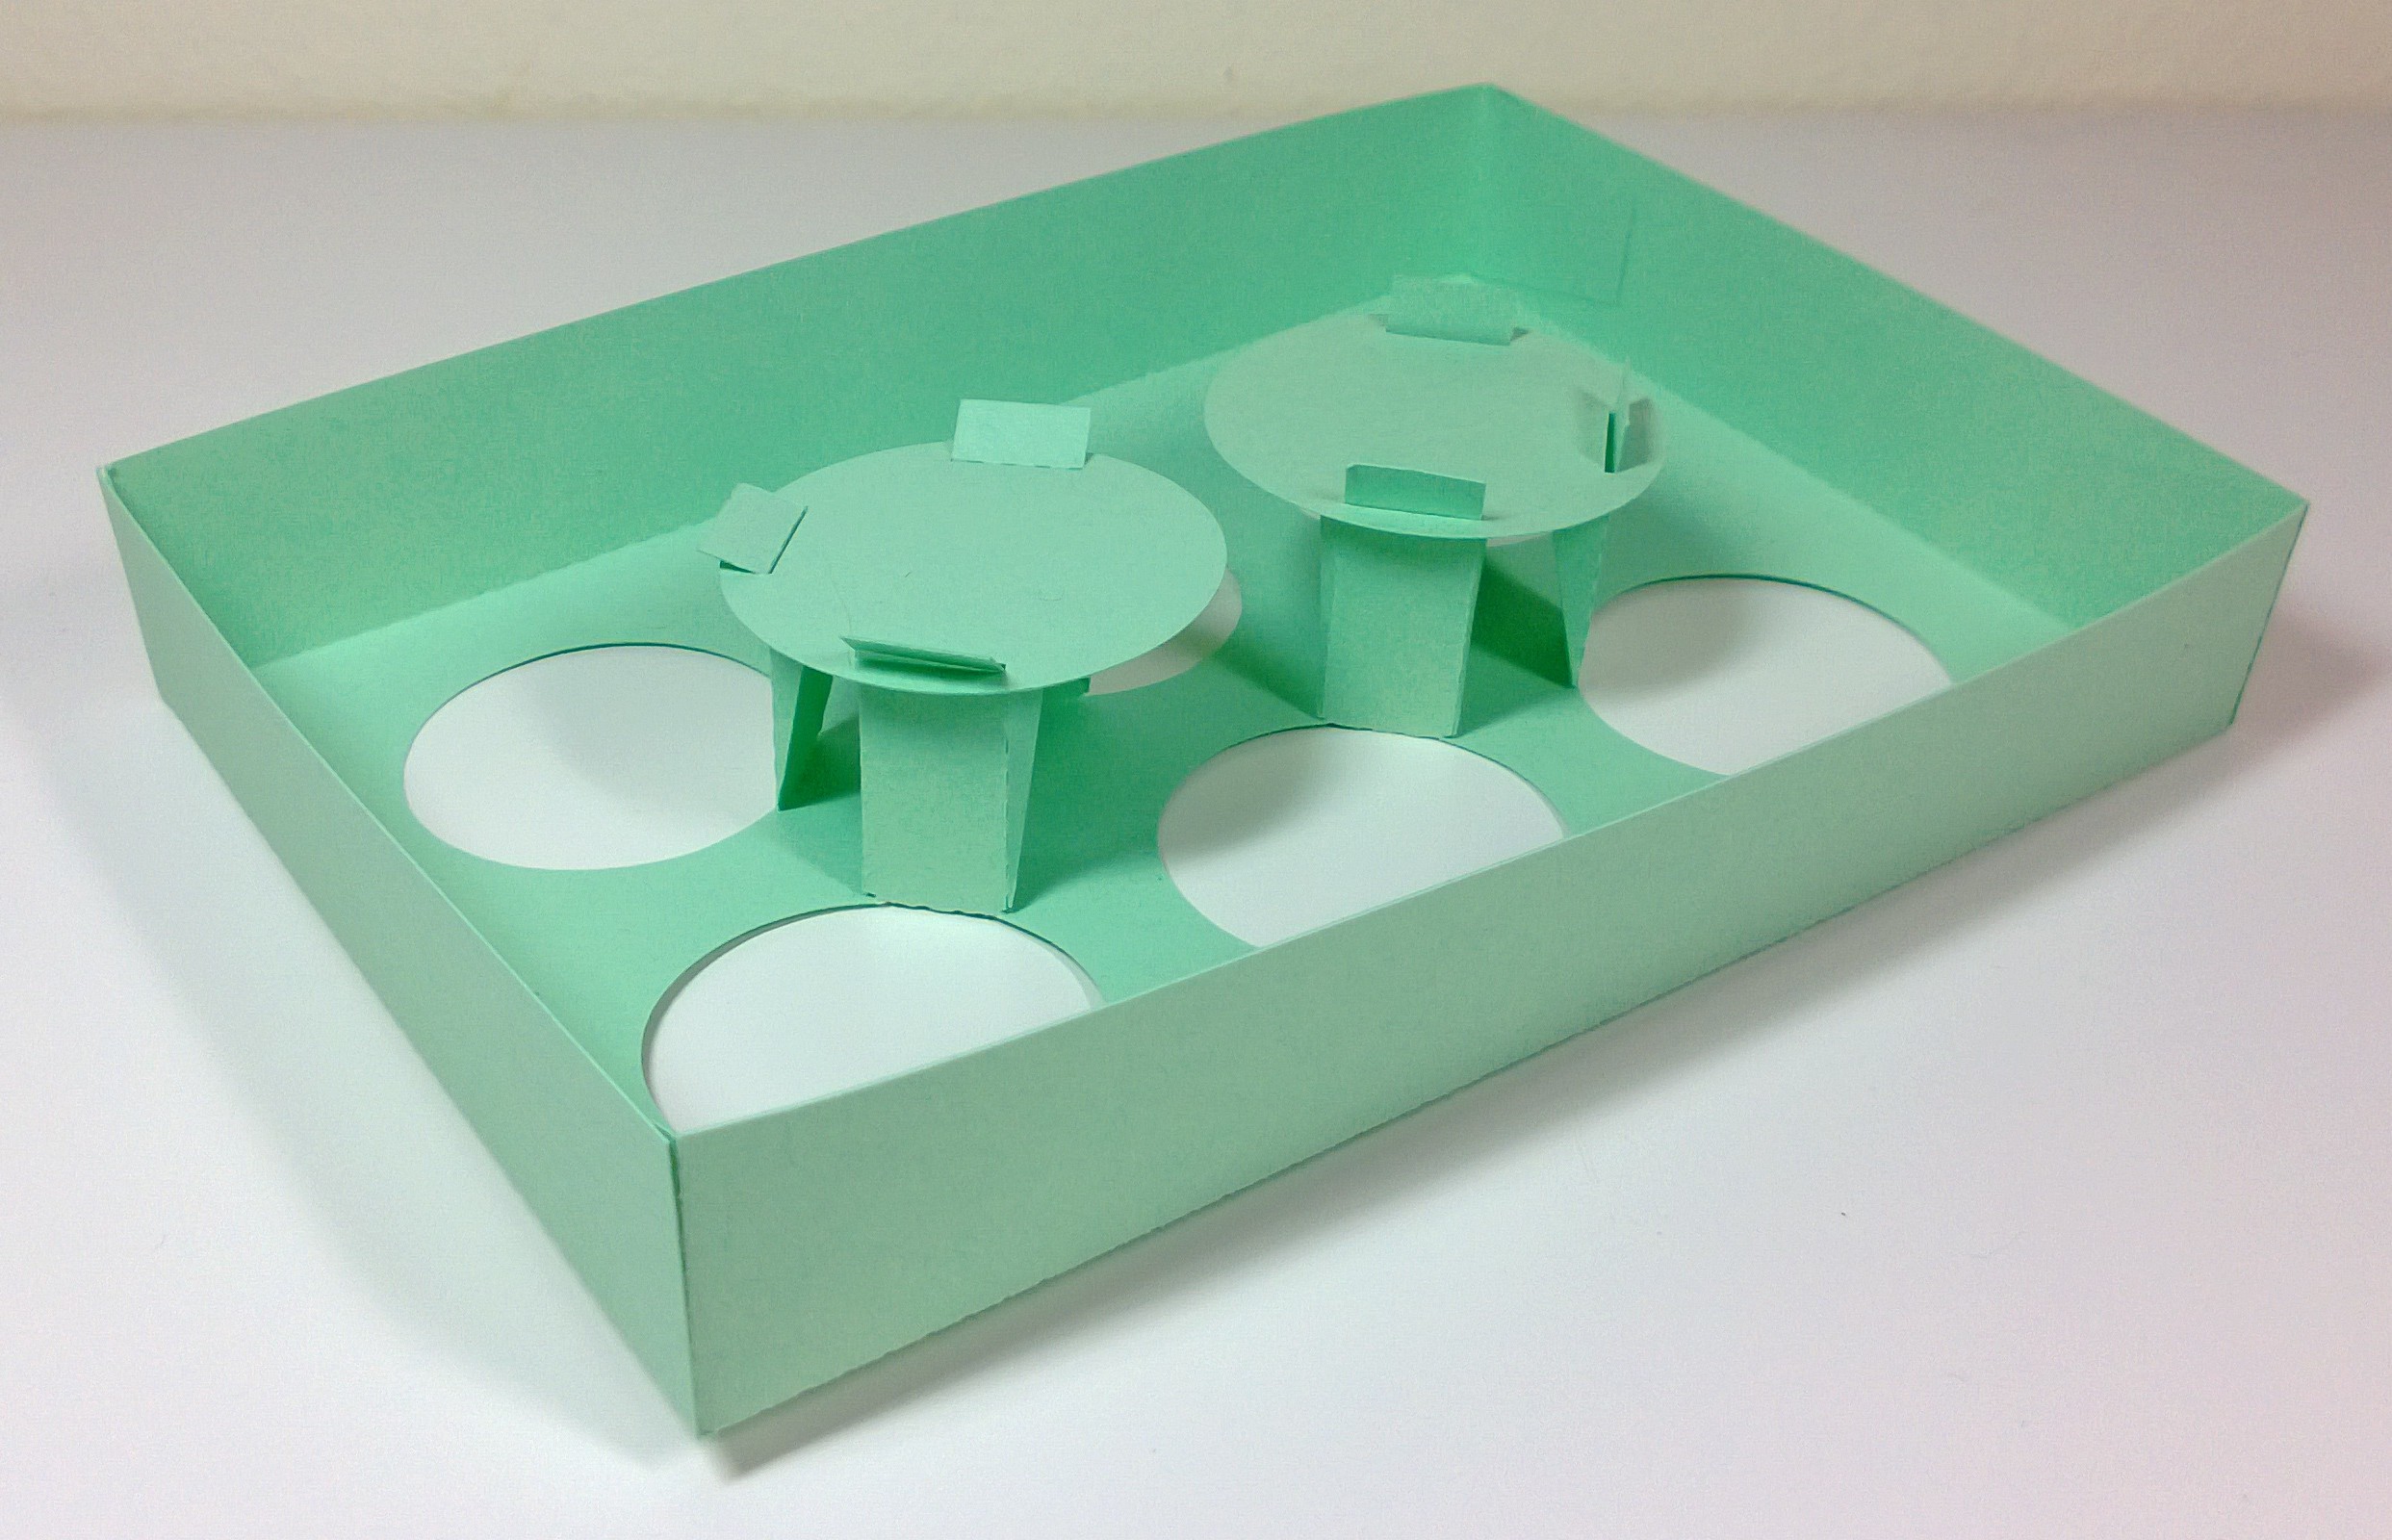
- Assemble the insert. This will help support the eggs and hopefully keep them from cracking. That is, if you’re transporting raw eggs in the carton. I would highly recommend pre-folding all the flaps EXCEPT for the small tab at the bottom of each leg. Otherwise, glue the four flaps on the side wall of the insert. The legs don’t get any glue.

The insert is being down upside down. Note that the tabs at the bottom of the six legs have not been pre-folded.
- Attach the pedestal bases. You have one base per three legs. Insert each of the tabs from the three legs into the slots and then fold the tabs over to keep the base in place. I don’t glue the tabs down, but you can if you want.

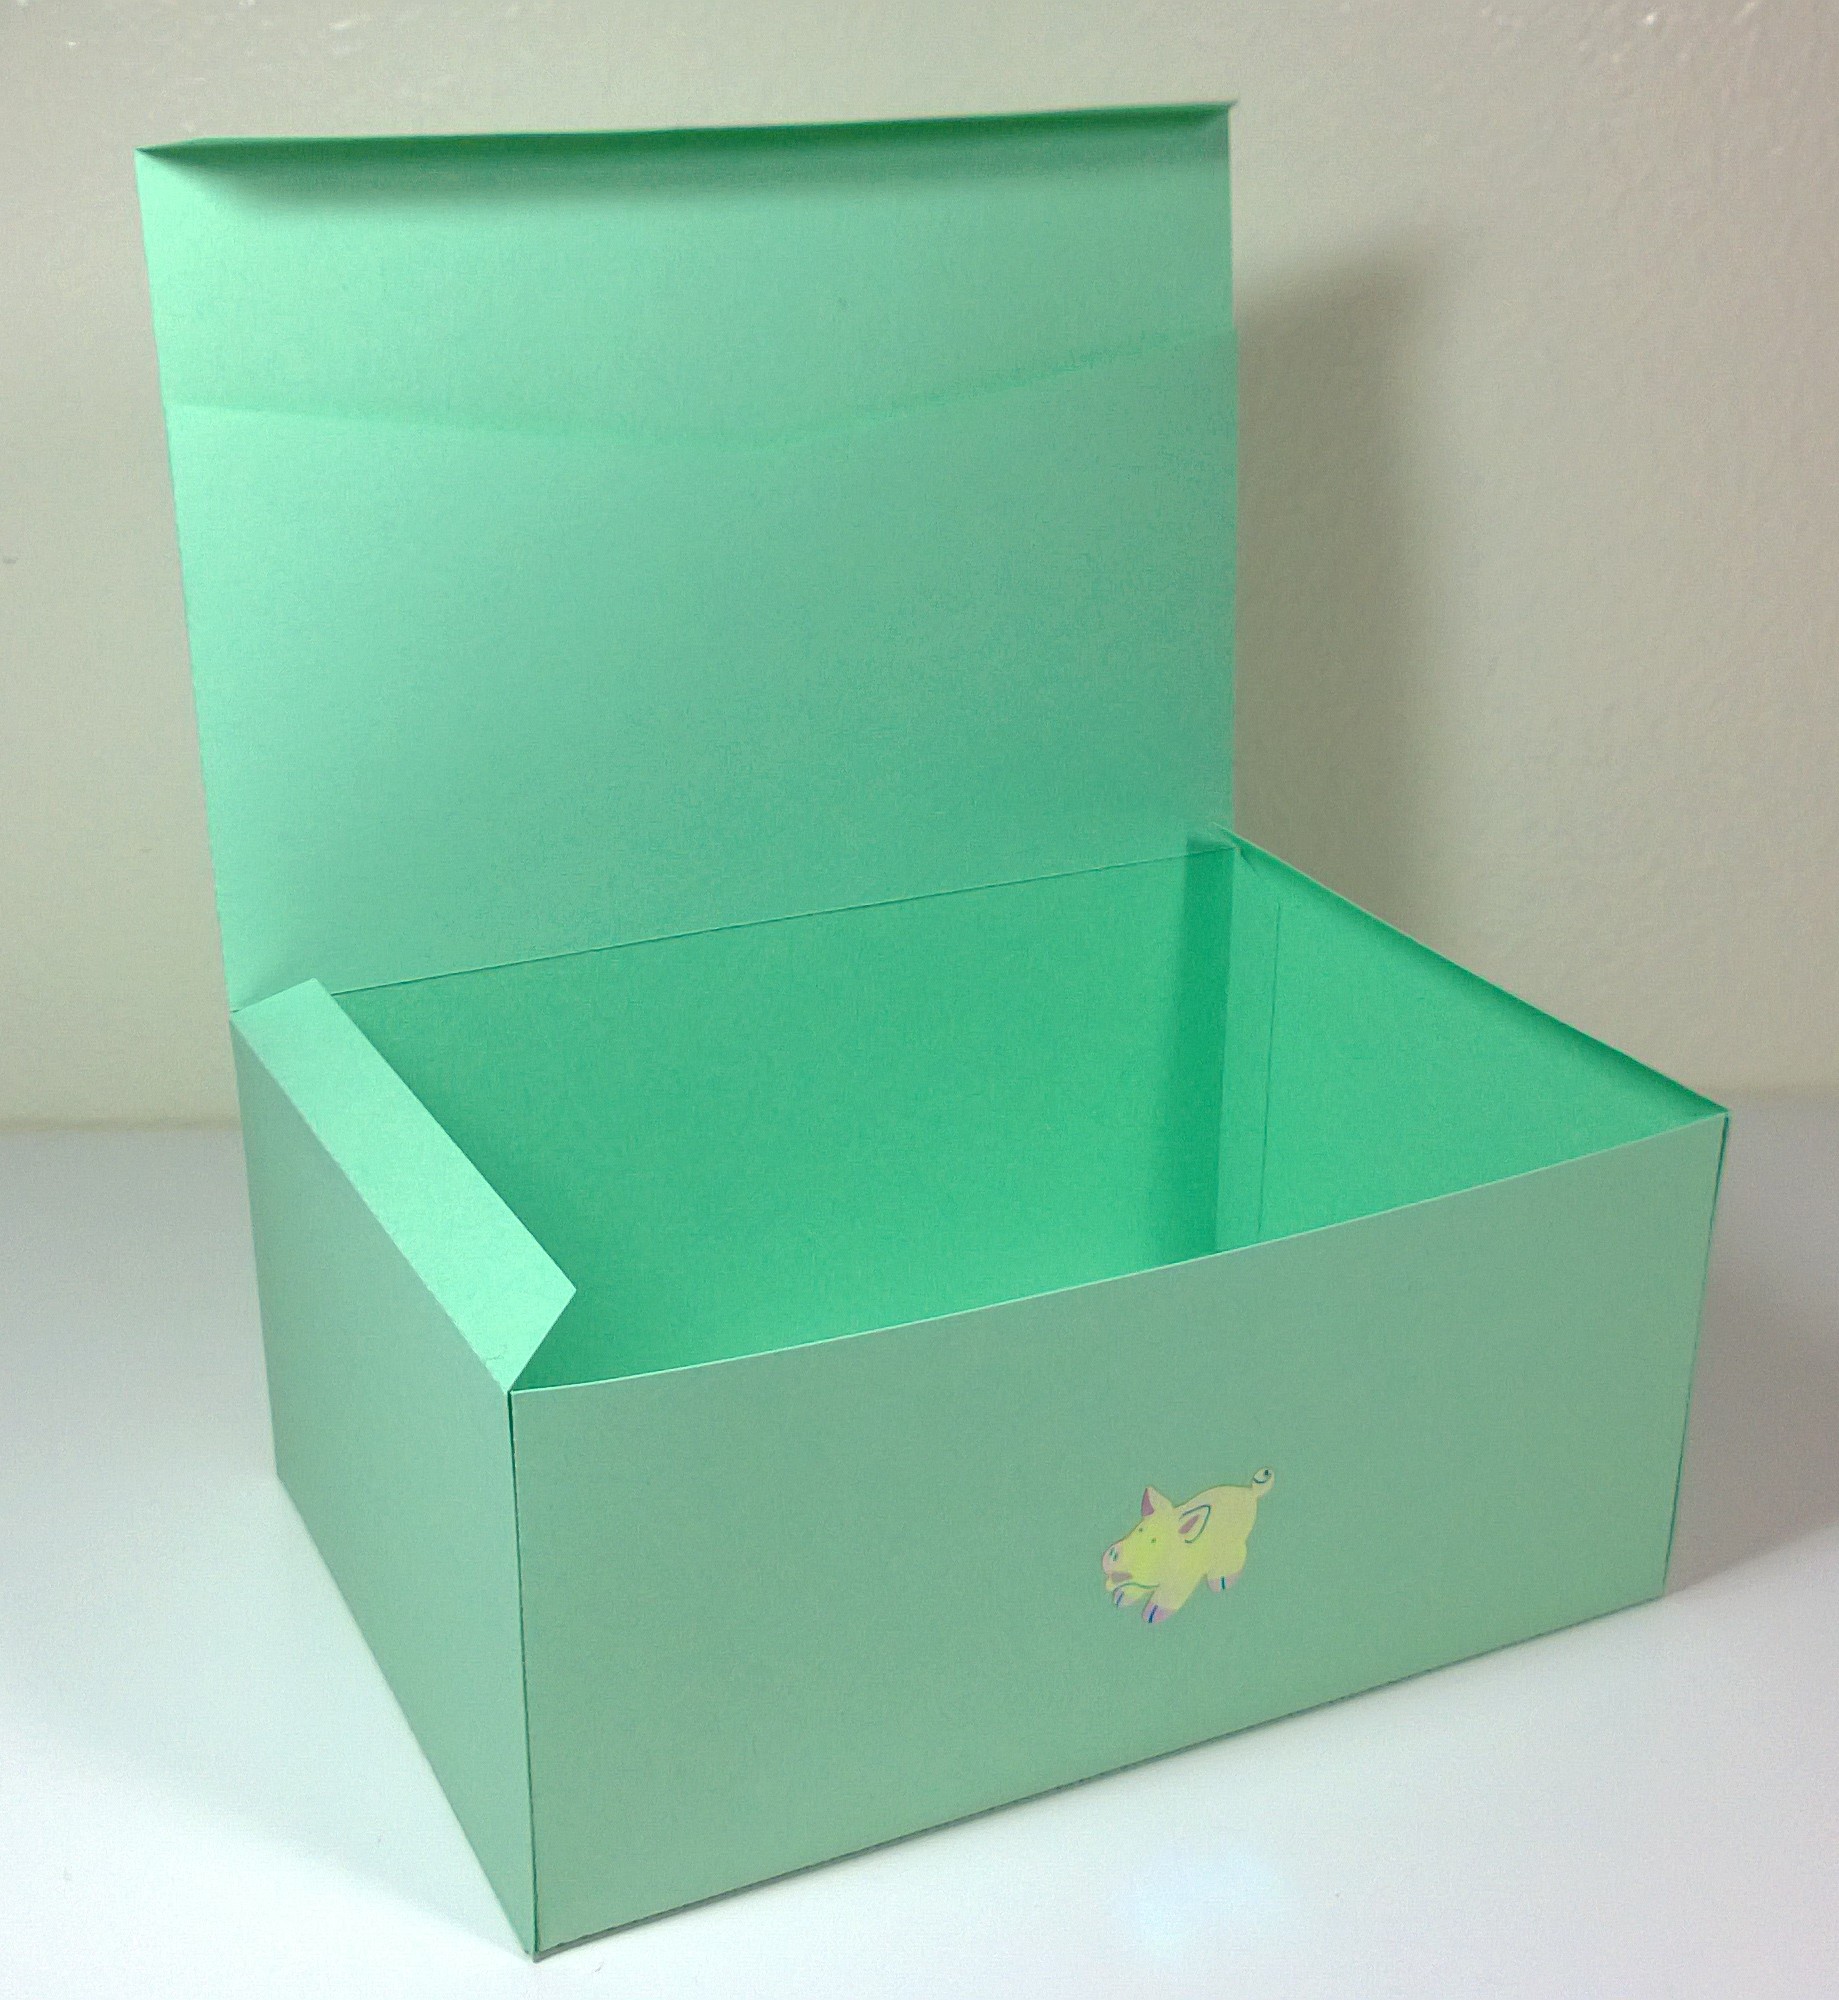
- Place the insert inside the carton. Load up them eggs. Finish! You can see the box filled at the top of the post. Mario doesn’t really have anything to do with eggs. It was just a colorful card I had that was an appropriate size. In hindsight, I probably should have put a Yoshi card in the flap. Oh well.


(If you’re really curious about the pig sticker, it’s hiding the word “Front” that I had accidentally cut out. I forgot to tell my Silhouette to ignore the labels when cutting. Sugh.)

7 Comments
That is a super cute egg carton and great tutorial. Since I keep bantams, that would be a good item to make for sharing their eggs. All the standard ones are too big, even they premade half dozen kind. Thanks
No prob. My mom also keeps some game hens that give smaller eggs, too. The insert has worked for those as well as the extra large eggs the Rhode Island Reds give.
What a great idea. i could see this as a good kid craft at easter time for the easter egg hunt.
I wasn’t able to open your studio file but LOVE this idea and share my home grown chicken eggs with friends . 6 instead would be perfect, would you please send a PDF of the template?
I’ll start converting the template to PDFs and add them to the post. It might be a little while though.
do you by any chance have a svg file for this project?
Unfortunately, I don’t. I know that there is software to convert studio files to svg, but I’ve never tested them.